Sunday, January 31, 2016

Week #3: Gesture Drawing Exercise

This week in class we had a discussion about gesture drawing and performed a few exercises that would help to loosen up students and get them drawing freely.  Unfortunately I missed this discussion, however I wanted to complete a blog entry about a possible gesture lesson anyway.

I would introduce gesture drawing to my students as a way of capturing the motion, the energy, and the essence of a thing quickly.  Most students in high school are very invested in their art looking “right,” so I would stress that the gesture drawing is meant to be quick and messy. 

I would start them off with a large scale drawing exercise.  I would either have students draw on the black board or on large upright drawing pads, and I would ask for a volunteer to pose.  The students would then be instructed to draw the model as completely and largely as possible within particular increments of time.  They would do 5 drawings at 10 seconds each, 5 drawings at 30 seconds, and 2 drawings at 1 minute. 
Examples of 30 second gesture sketches.
(Retrieved from:  http://ctrlpaint.deviantart.com/gallery/37760550/Week-3-Gesture-Drawing)

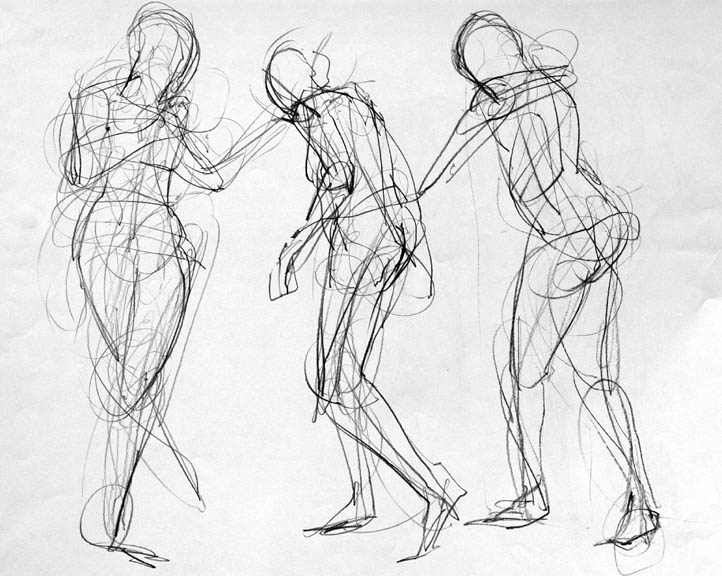
Example of longer gesture sketches.
(Retrieved from: http://jenheydtnelson.weebly.com/gesture-drawing.html)

Following this exercise I would have the students begin a new drawing of a new model and allow them to draw for 10 seconds.  Then I would ask them to rotate around the room – to a new position, a new drawing, and a new viewpoint – and work on the new drawing for 10 seconds.  We would continue this process with slowly increasing lengths of time.  This process would allow students to work objectively, unattached to their drawings.


After doing these exercises and effectively opening up students I would have the students begin a longer full-figure portrait pastel drawing.  This portrait would be based upon live models from the class, and started as large scale gesture drawings done in pencil and pastel.  After the initial gestures are completed, the drawings can be developed into complete, detailed portraits.

Example of a pastel gesture drawing.
(Retrieved from: http://www.artistdaily.com/blogs/pastel/pastel-patricia-a-hannaway-drawing-what-the-model-is-doing)

Example of a developed pastel portrait (not full figure - but close),
(Retrieved from: http://www.judithcarducci.com/drawings.html)

Week #3: Perspective Drawing Exercise

Early this week we talked about perspective drawing and performed an exercise in teaching and learning how to draw perspective.

If I were going to teach a lesson in perspective drawing I would approach the subject in much the same way as we did in class.  I would introduce the concept by having students follow along to complete a couple of simple line drawings.  After going over one and two point perspective I would have students use photographs of architecture place on top of newsprint, or under tracing paper, to trace the horizon lines and find the vanishing points “in real life.”

(Retrieved from: http://charlieserafini.blogspot.com/2014/10/invisible-cities-perspective-exercises.html)

Examples of the simple line drawing introduction.


Examples of a vanishing points being found in a photograph.  Similar to the exercise I would have students perform. *

After this exercise I would have my students begin an architectural, imagined-cityscape drawing.  I would prompt them to draw illustrations for Invisible Cities by Italo Calvino.  I would allow them the option of choosing to complete a one point, two point, or, in the case of an advanced or ambitious student, a three point drawing.  I would encourage the students to experiment with a variety of architectural styles, include detail, and work on a large scale.


Examples of student perspective drawings.


*(retrieved from: http://bradyarchitecturalphotography.com/one-and-two-point-perspective-in-architectural-photography/ , http://mathforum.org/workshops/sum98/participants/sanders/1ptPersp.html  and http://www.studentartguide.com/articles/one-point-perspective-drawing)

Week #3: Classroom Expectations

This week we spent some time discussing discipline and class expectations.  The important part of having class expectations, or rules, is having a list that is specific and positive.  With that in mind, we were challenged to some up with our own list of 5 basic expectations in class.  My group came up with the following list:
  1. Respect:  Respect your materials and your peers
  2. Volume Control:  Speak quietly and only during the free time
  3. Directions: Follow all teacher directions and instructions
  4. Effort:  Make an effort.  Effort equals excellence
  5. Organization:  Help to keep the classroom clean and organized

Other groups had similar rules, however a few stood out for being different.  They included:
  1. Be prepared
  2. Be patient
  3. Challenge yourself
  4. Understand that everyone in the class is an artist in their own way
  5. Understand how to give and receive constructive criticism

We then discussed Ms. Gina Taylor’s expectations for her classroom and went over them in detail.  She pointed out that they were specific in their language, they did not include any “Do Nots,” but instead had included a kind request to refrain from particular actions, and they are subject to change as school climate and culture shift.  As a result of this discussion I will create a list of expectations I would like to apply to my own classrooms in the future.  Here it is:

Classroom Expectations

Please arrive to class on time and be ready to begin class.
Be quiet and pay attention during instruction and announcements.
Follow all safety guidelines for using tools, equipment, and materials.
Clean your workspace and work with other students to keep the room clean and organized.
Respect the materials and equipment in the classroom, students’ artwork, and one another.
Follow all teachers’ instructions and directions.
Participate in class discussion and projects – show effort.

Please refrain from the following:
Talking loudly or across the room
Using inappropriate or hurtful language
Chewing gum
Drinking from any container that does not close tightly
Fighting, rough-housing, or running
Throwing any materials or equipment in the room
Leaving the room without teacher approval
Using cell phones without teacher approval


Sunday, January 24, 2016

Week #2: Blind Contour Drawing Exercises

This week we discussed the importance and the versatility of the blind contour drawing as a first week exercise for a high school art class.  This exercise helps to break down the symbolic way in which students draw and forces them to draw what they actually see.  This leads to more accurate drawings with fresher marks that are more considered.

We attempted some of these drawings ourselves with permanent markers on newsprint paper.


We also talked about having students complete a series of blind contours to warm up, slow down, and break down, followed by a longer series of modified contour drawings (that allow for limited lifting of the pen and limited looking at the paper).  These drawings are where you can start to see students make really interesting art.

We attempted a short series of these as well.


These drawing techniques can be applied to any subject.  We drew our hands, but we discussed drawing simple and complex objects (including plants and typewriters), hands, feet, and portraits.
We did a contour portrait drawing based upon a Picasso drawing, but in order to continue breaking the visual language and symbolic simplification our brains often engage in we were instructed to turn our reference image and paper upside down before drawing.

Below are a couple of my attempts followed by some student examples.


(Examples of student portrait work)

This project can actually yield wonderful, detailed, thoughtful student artwork that can be shown as is or used in an extension project.  One of the ideas I had for an extension of this project would be to use it as the basis for a stained glass water color painting. 


The first step would be to transfer one of the better contour drawings to a piece of watercolor paper.  Then the students would need to go over their drawing with permanent marker to keep them bold and fresh.  The next step would be to use water color paints to fill each section of the drawing, each pocket of negative space, with a different shade of color.  This would be a good time to discuss the basics of color theory including contrasting and complimentary colors, warm and cool colors, and tints and shades.  Students could make the decision to use colors that resemble their subject, or a non naturalistic color scheme.  As a result of this project each student would have a unique work of art and a working understanding of contour and watercolor, as well as a better understanding of color.  In addition, the relatively simple nature of this lesson would allow the teacher to assess student understanding early, and introduce some basic concepts.

(Examples of student work from similar extension projects)


Saturday, January 16, 2016

Week #1: Advice for the Future First Day of Class

There are some things you should remember as you begin teaching, whether it is for the first time, or just for a new semester.  Obviously, you should try to be as prepared as possible for classes as far as supplies, organization, and lesson plans are concerned, but you should also keep some of the following tips in mind.  You want to be the best teacher possible, and these things can help:

1.  Make personal connections with your students

-Learn your students names, whether that involves playing name or introduction games, using name tags, having a seating chart, or simply practicing and asking the students to remind you.  This is very important.
-Talk to your students about their goals, and ask them questions about themselves.
-Let students ask you questions, and respond honestly if you do not know the answer.
-Work to keep student information accurate and organized – it shows that you care.

2.  Prepare for students with specific needs

-Check the permanent records of students before classes begin and make notes.
-Make note of any information school nurses or guidance counselors have about your students.

3.  Keep yourself happy and healthy

-Wear comfortable shoes.
-Get enough sleep, and make sure your alarm will get you up early enough for school.
-Do not stress yourself out with home projects, big events, or life changes at the same time school is starting.
-Eat well.
-Remember to take breaks occasionally.
-Stay organized by making “to do” lists, setting priorities, and planning ahead.